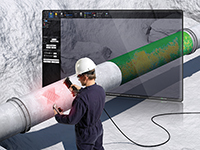
Surface corrosion assessment of full pipe joints
23/01/2019
services, has released Pipecheck 5.0, which features major enhancements enabling integrity assessment of full pipe joints. Since its introduction in 2011, Pipecheck has become established for providing accurate and reliable NDT surface damage diagnostics on both the inner and outer linings of pipes, using both ultrasonic testing and 3D scanning, whether for corrosion, dents or gouges in the metal. The new version of the software features enhanced weld-to-weld inspections with full-pipe joint assessment of up to 18 m-long pipes for surface inspection of industry-standard pipe joints up to 56" (approximately 142 cm) in diameter. On-site analysis and reporting are up to six times faster and data analysis is performed in sections and analysed together to produce a single comprehensive final report, so that pipeline owners have crucial information should they need to act quickly. Inspection time can be divided by the number of scanners used to ensure a faster total inspection time. Other key competitive advantages of the Pipecheck solution include reliable and repeatable measurements that are independent of the skills of the operators or the technicians.
“The challenge was to not only increase Pipecheck’s capability as far as pipe lengths are concerned but also improve the speed of the analysis and reporting, regardless of the size of a pipe,” said Steeves Roy, Product Manager at Creaform. “With no compromise on the speed of data processing, analytics and reporting, Pipecheck 5.0 now becomes the most trusted full-pipe joint assessment solution on the market. All Pipecheck licence owners already in the field and covered by the Creaform Customer Care Programme will benefit from this major software upgrade.”
Mathieu Magnan, Business Development Manager at Creaform, said: “Most asset owners and NDT service companies are turning to Pipecheck for pipeline corrosion mapping and assessment. What is key for our customers is the accuracy and repeatability of 3D mapping compared with manual measurements, as customers need to make the safest decision regarding a pipeline’s integrity. Inspections that used to take days can now be performed in only a few hours with direct on-site reporting using Creaform technologies. With Pipecheck 5.0, it is now possible to scan, analyse and report data from a full pipe joint in less than a day. This is a major leap in performance compared with previous versions of the software.”
www.creaform3d.com